Running using Napari
This section goes over how to use the napari to train and predict on a custom dataset.
Note
This guide assumes you have already installed CryoViT and setup napari by following the instructions in Installing CryoViT and Setting up napari. If you have not done so, please do that first.
You also need a valid .dset file, which specifies the training dataset. See Setting Up a Dataset for instructions on how to set one up.
A GPU is also highly recommended.
The Training Manager
The Training Manager covers the same functionality as the cryovit train and
cryovit evaluate commands in the
CLI.
First, open the Training Manager from the “Plugins” menu under “CryoViT”. Below is what your napari window should look like after opening the Training Manager:
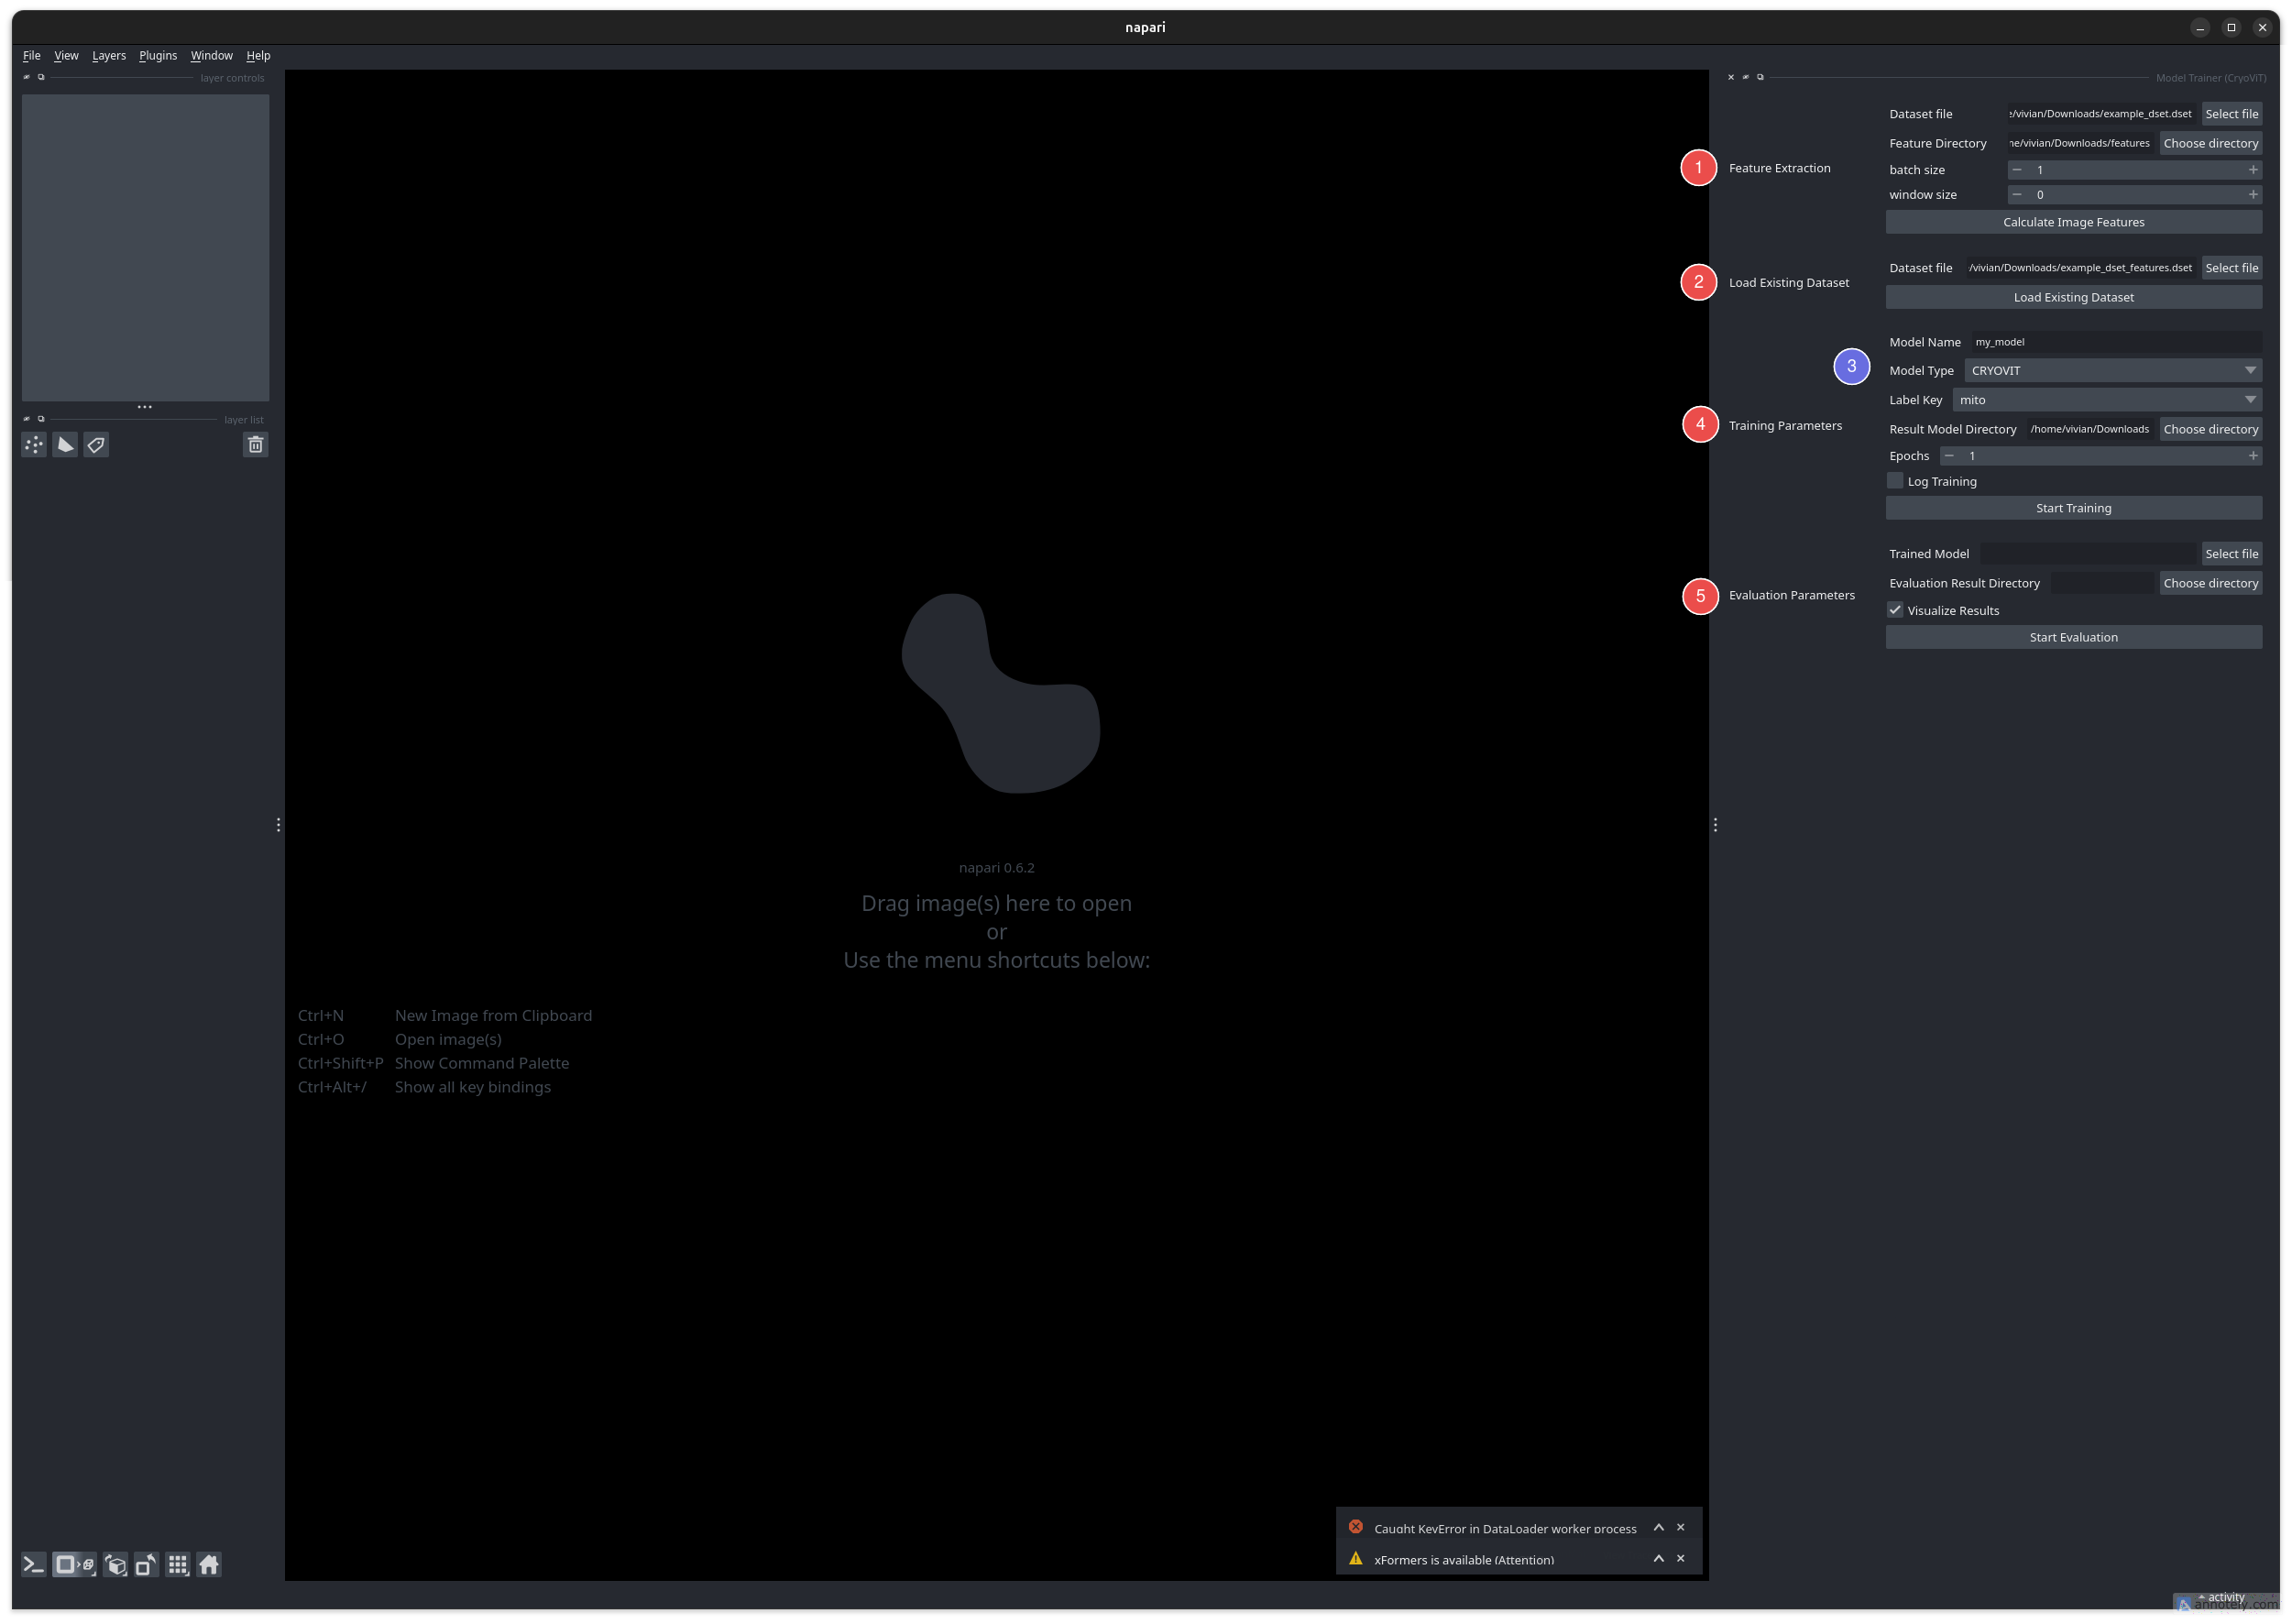
The CryoViT Training Manager in napari.
First, we need to load in a dataset file. This depends on the model you want to train:
When using the CRYOVIT model, DINOv2 features need to be calculated before training.
Use the “Feature Extraction” section (1) to create a new dataset containing the features. This will automatically be selected when “Calculate Image Features” is clicked.
When using any other model (e.g., 3D U-Net, SAM2), you can directly load your dataset in the “Load Existing Dataset” section (2).
Then, select the model you want to train in the “Model Selection” section (3). This involves choosing a name, the model architecture (e.g., CRYOVIT, 3D U-Net, SAM2), and the label you want to train on.
Finally, click “Start Training” in the “Training Parameters” section (4).
Note
For monitoring training progress in more detail, you can enable the “Log Training” option, which will print an additional command in the terminal that you can run to monitor training with Tensorboard.
This is similar to the --log-training option in the
CLI.
When training is complete, you only need to specify an additional “Evaluation Result Directory” to run evaluation on the same dataset. This step is optional, and can be skipped if you just want to use the model for inference.
Note
The “Visualize Results” option will save the evaluation predictions,
similar to the --visualize option in the CLI
The Inference Manager
The Inference Manager covers the same functionality as the cryovit infer
command in the CLI.
First, open the Inference Manager from the “Plugins” menu under “CryoViT”. Below is what your napari window should look like after opening the Inference Manager:
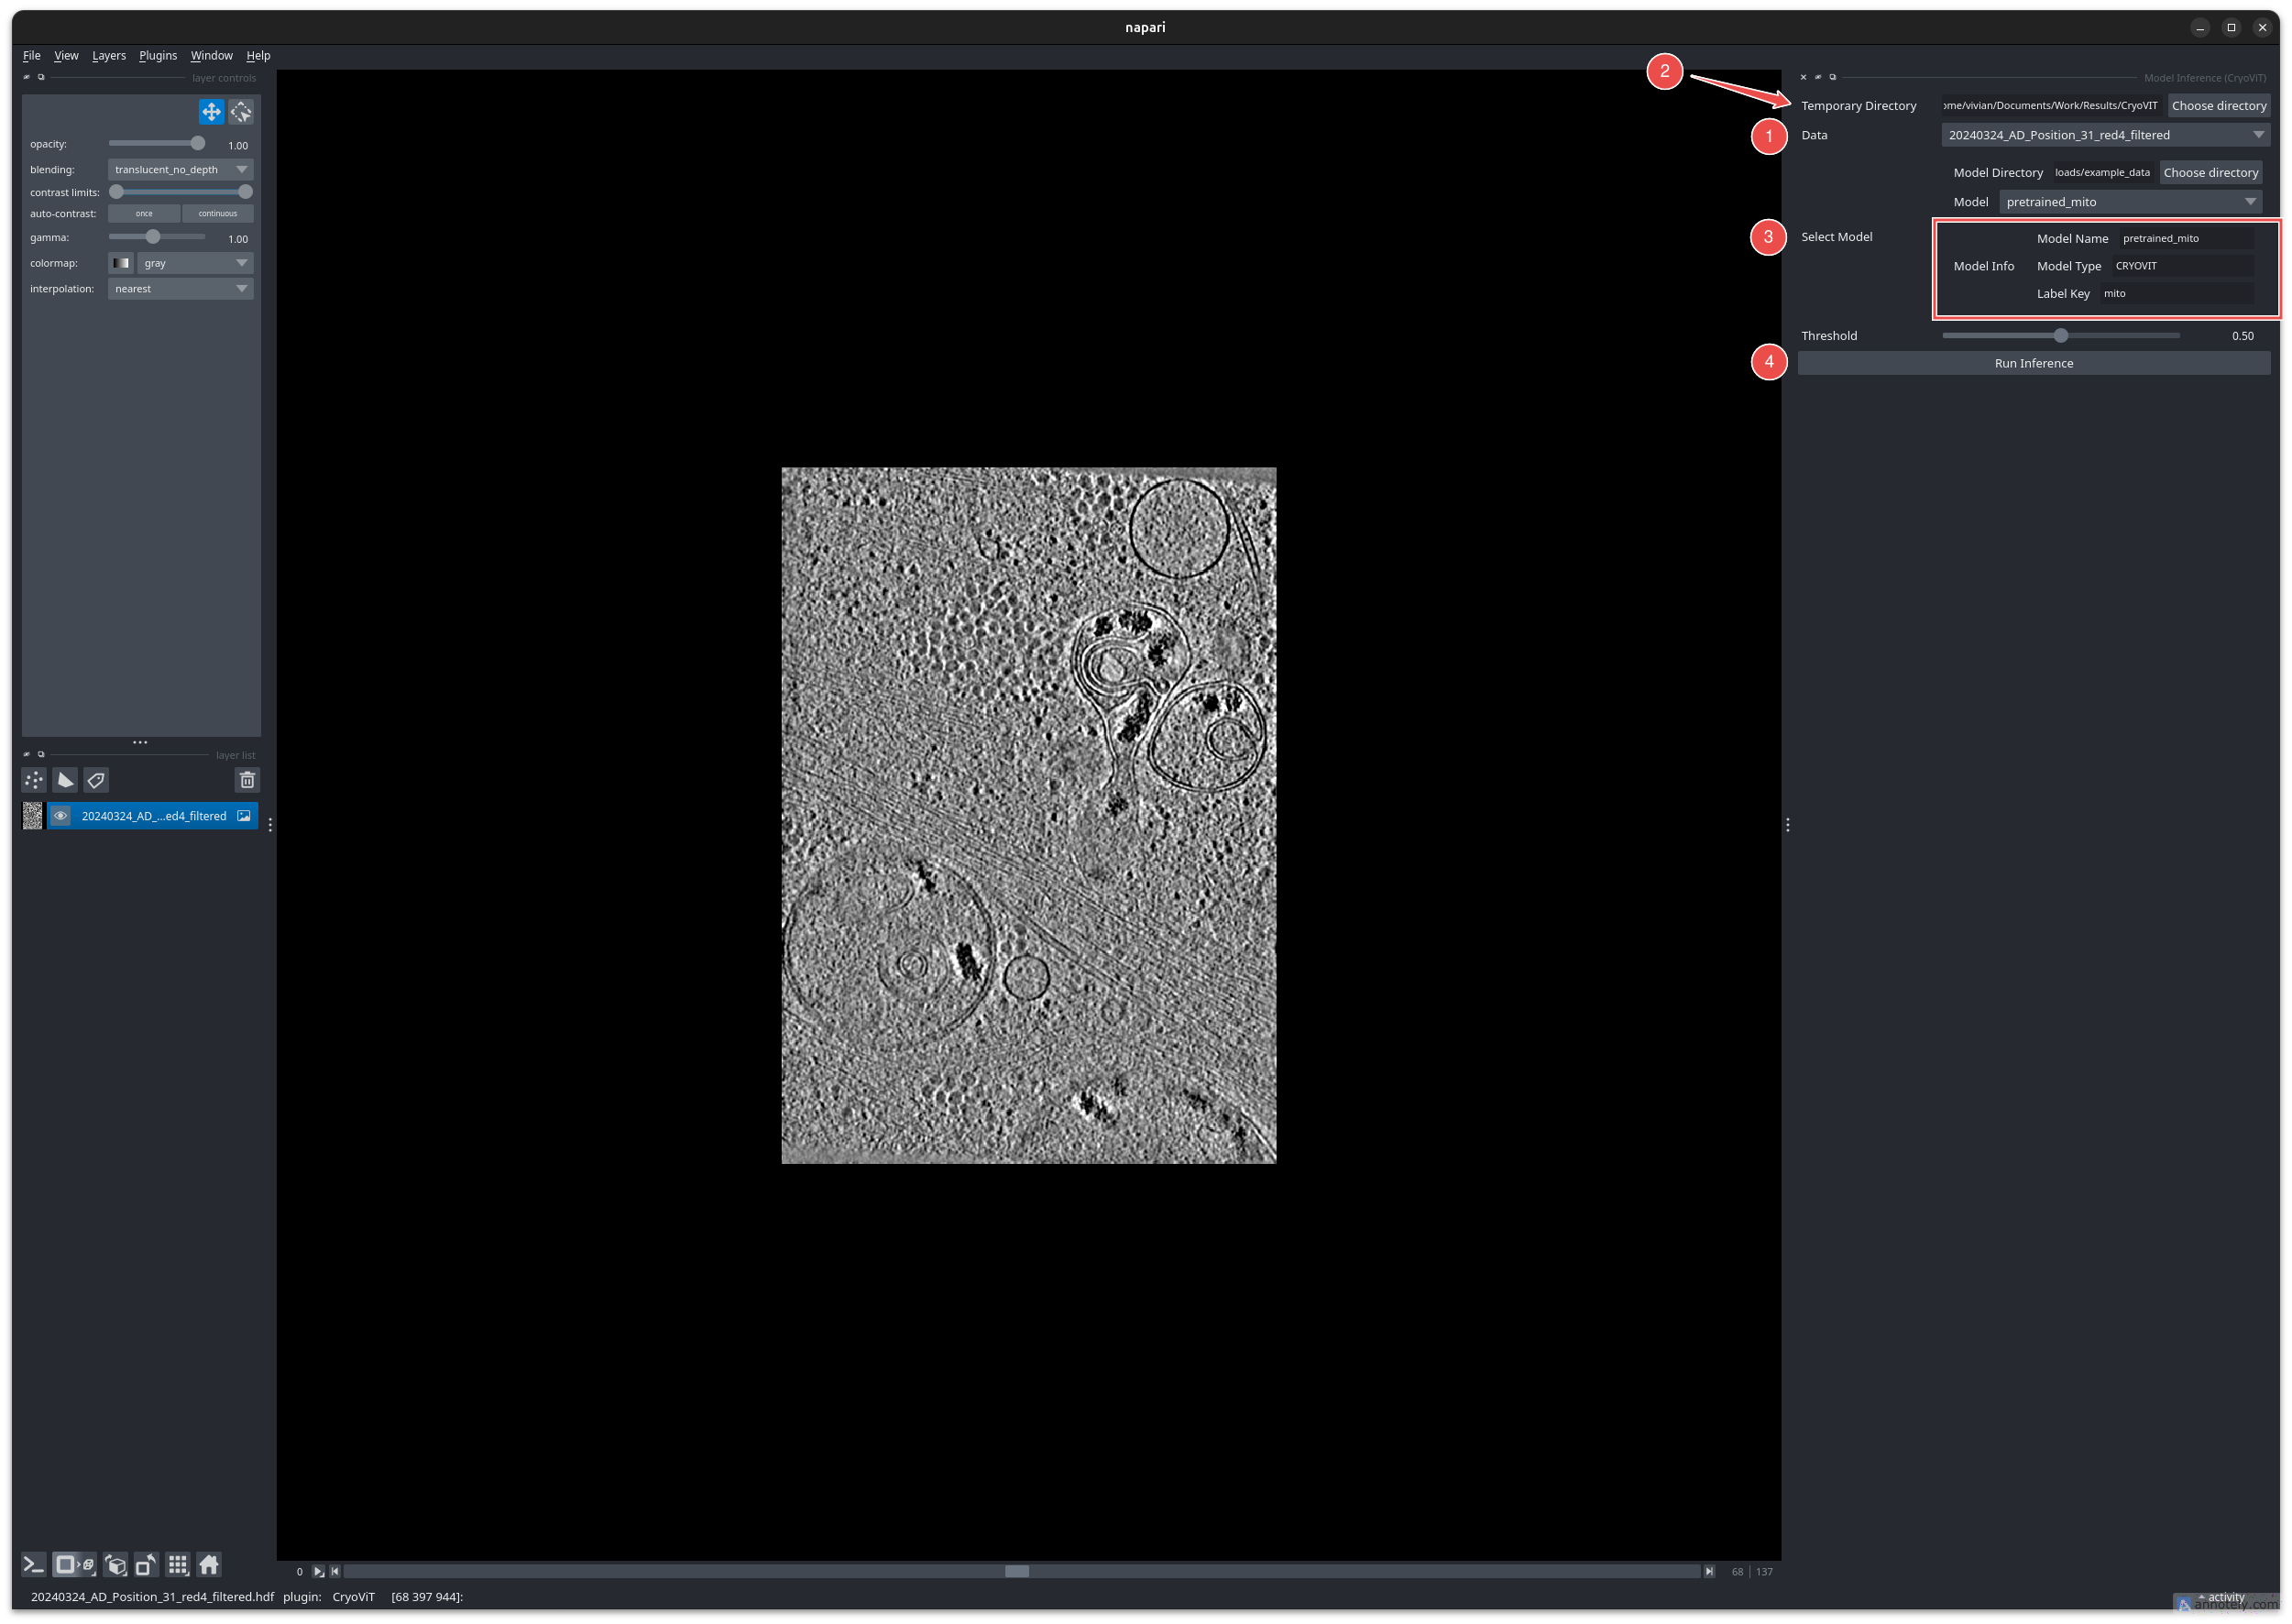
The CryoViT Inference Manager in napari.
The Inference Manager assumes you have imported data into napari, which can then be selected in the “Data” section (1), and have your pre-trained models saved in a folder, which can be specified as the “Model Directory” (3).
The plugin will read all .model files in the model directory,
and you can then select which model to use.
The “Model Info” section will display basic information about the model that you specified during training.
Note
If using a CRYOVIT model, then DINOv2 features will be automatically computed for the input data before running inference.
These are saved in a temporary folder (1), which is then deleted after inference is complete.
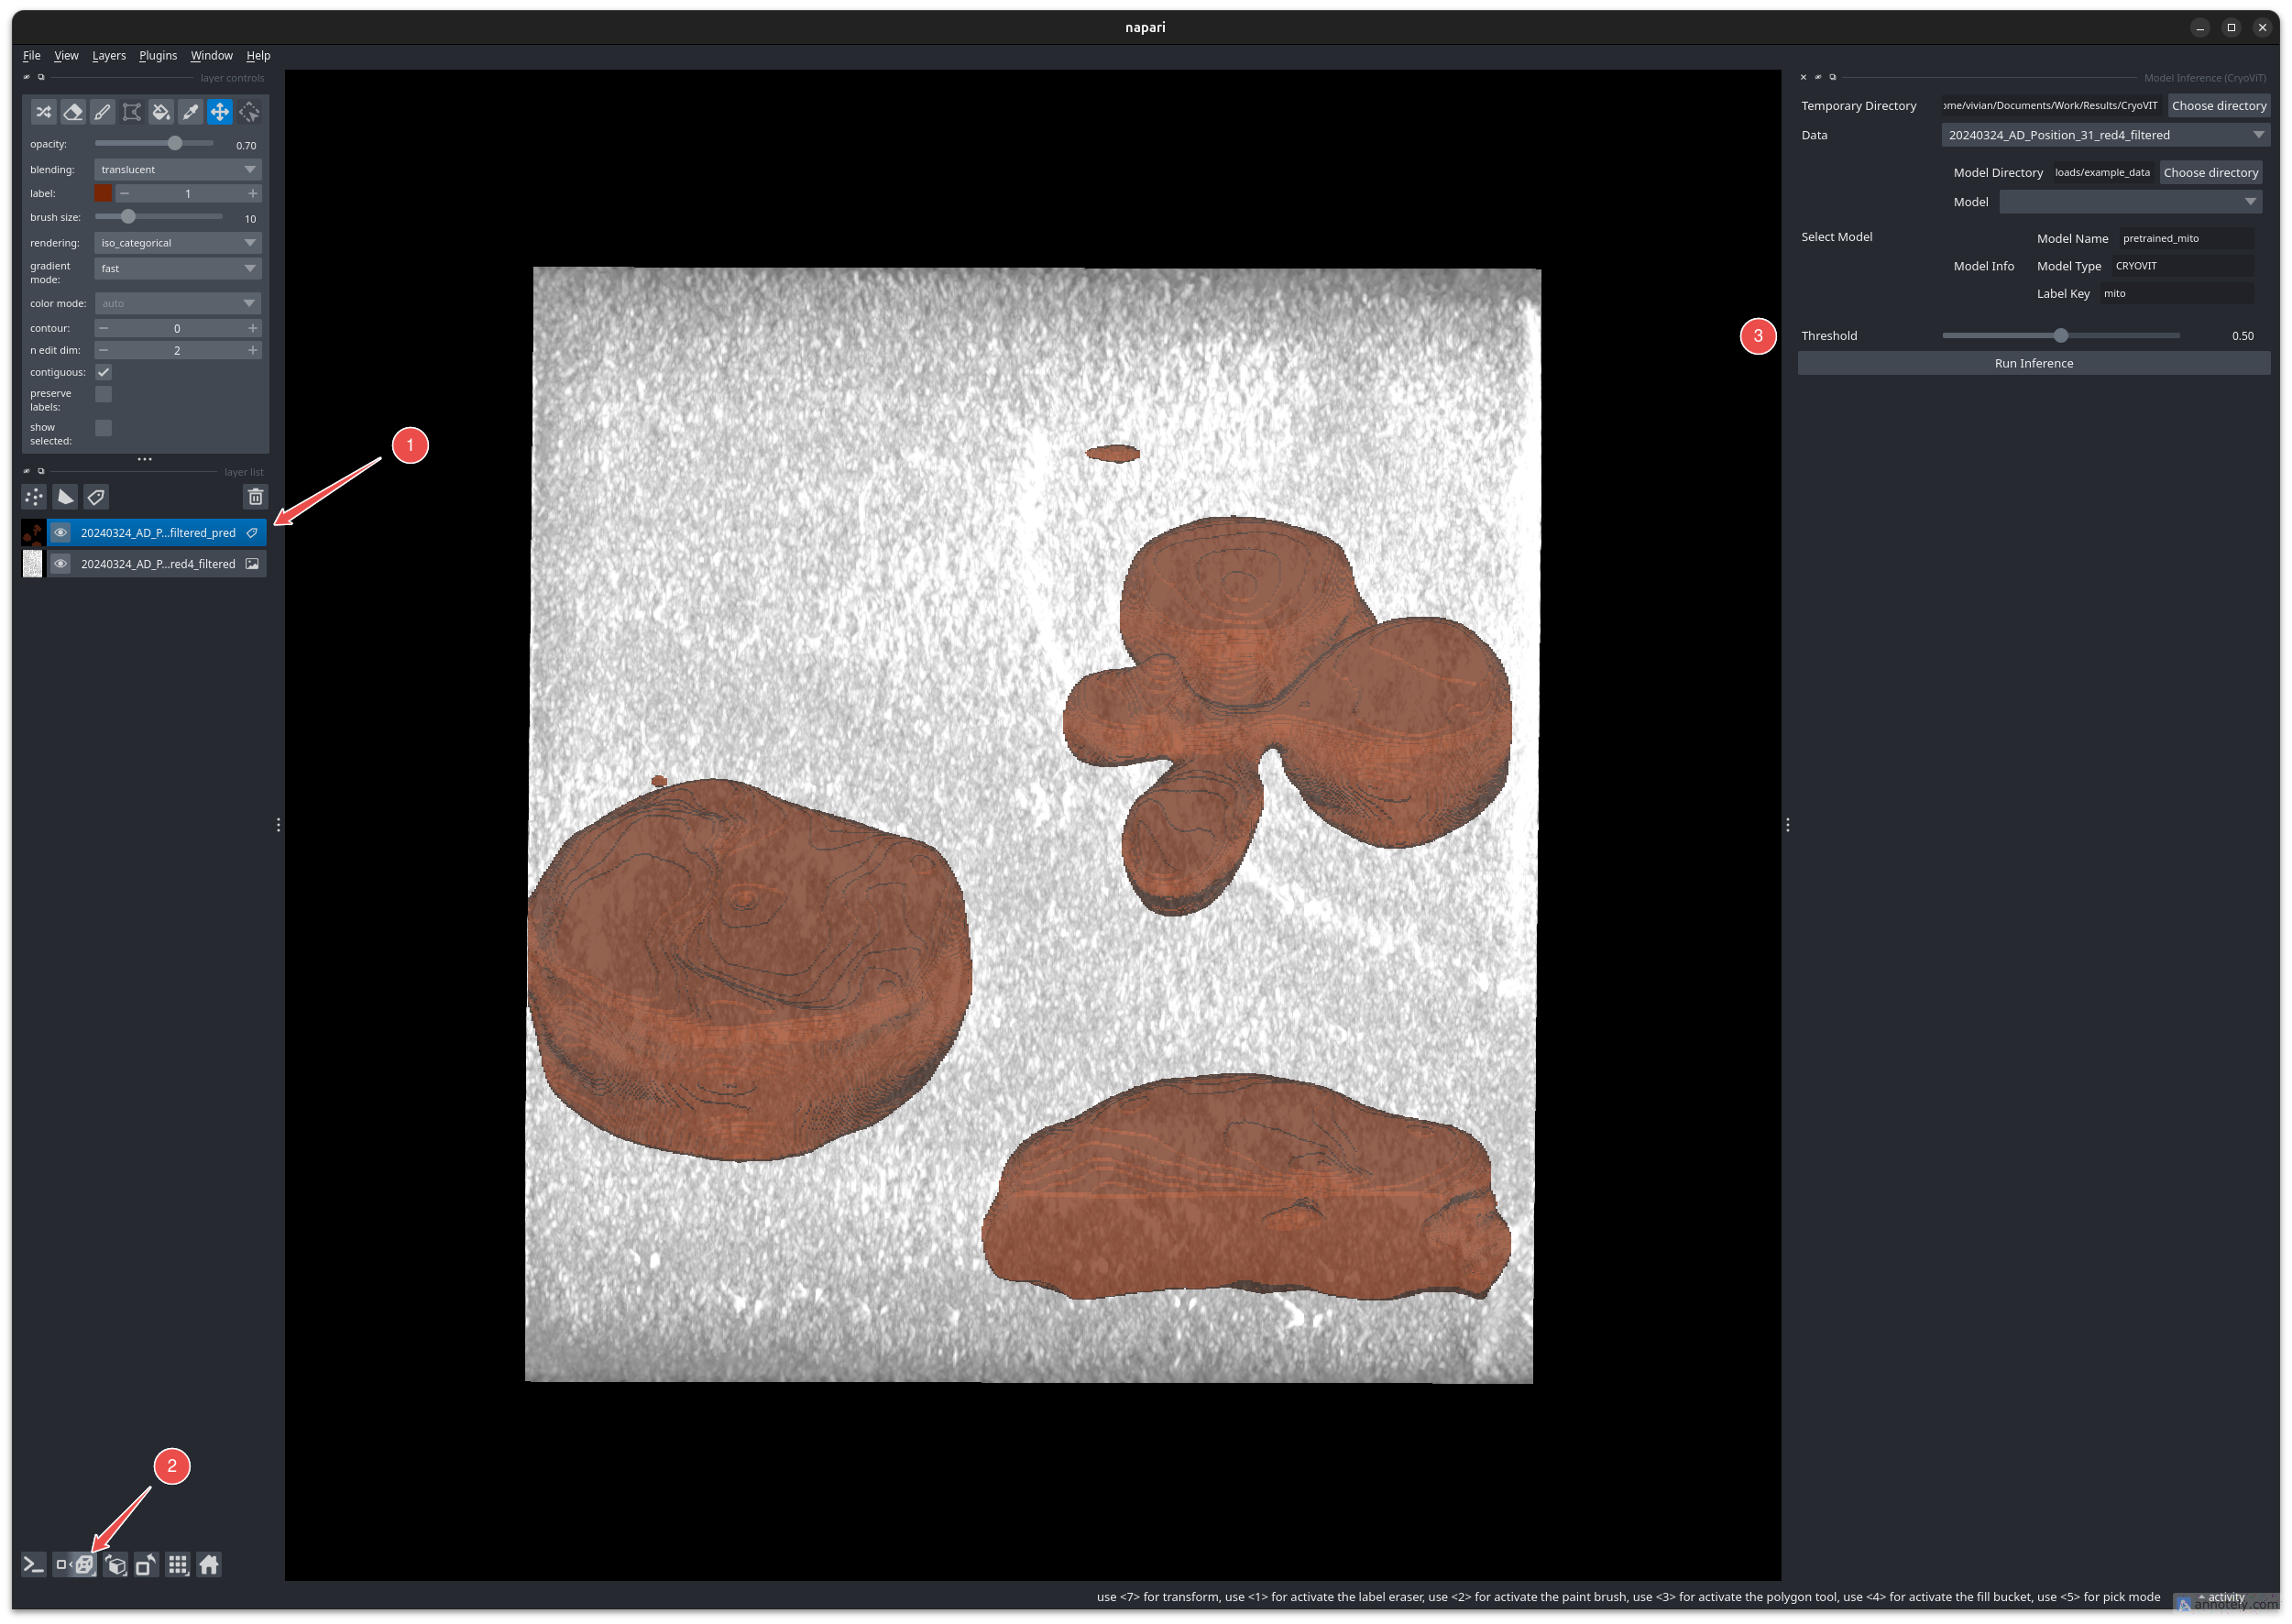
Inference results on an example tomogram using the pre-trained mitochondria model in the quick start guide. The results are visualized in 3D mode (2).
Tip
Similar to the CLI, adjust the threshold slider (3) to change the confidence threshold for generating the binary segmentation mask.
Note
If you plan on doing inference for a large number of files, it is recommended to use the CLI instead of the napari plugin, since the plugin has an additional overhead for computing DINOv2 features for each file.