Running from the command line
This section goes over how to use the CryoViT CLI to train and predict on a custom dataset.
Note
This guide assumes you have already installed CryoViT by following the instructions in Installing CryoViT. If you have not done so, please do that first.
You also need a valid training dataset. See Setting Up a Dataset for instructions on how to set one up.
A GPU is also highly recommended.
Training a Model
You can train a new model using the train command:
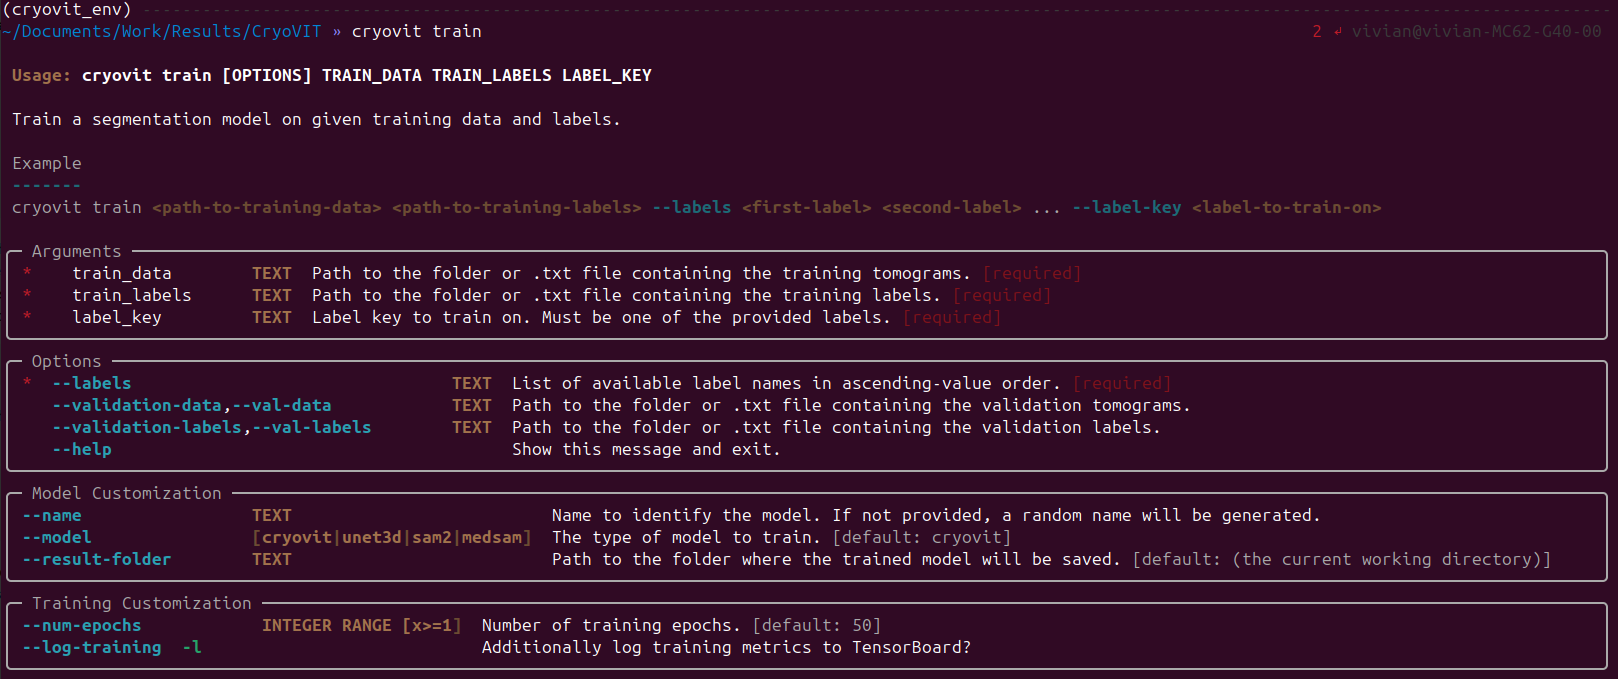
Output of cryovit train --help command.
So, to train a model, you would run a command like the following:
$ cryovit train train.txt labels.txt mito --val-data val.txt --val-labels val_labels.txt --labels mito membrane --name mito_model
This command would train a model to segment mitochondria, given label files that have both mitochondria and membranes labeled.
The training data is specified in
train.txt, and the corresponding labels are inlabels.txt.The validation data is specified in
val.txt, and the corresponding labels are inval_labels.txt.After training, the model will be saved as
mito_model.modelin the current directory.
If your training dataset is organized in folders, then you would replace
*.txt with the folder names.
Important
If using --model cryovit (the default), then your training and
validation data must either contain DINOv2 features, or you must
compute the features first using the cryovit features command.
See Quick Start Guide for an example of this.
Monitoring Training
If you specify the --log-training argument (or -l for short), then
you can monitor the training progress using TensorBoard.
When training starts, a message will be printed of the form:
$ INFO  Setup TensorBoard logger. View logs with `tensorboard --logdir
        <path-to-log-dir>
Running this command in a separate terminal will then give you a local URL, which you can use to monitor the training progress in your browser.
Evaluating the Model
After training, you can evaluate the model on a test dataset using the
evaluate command:
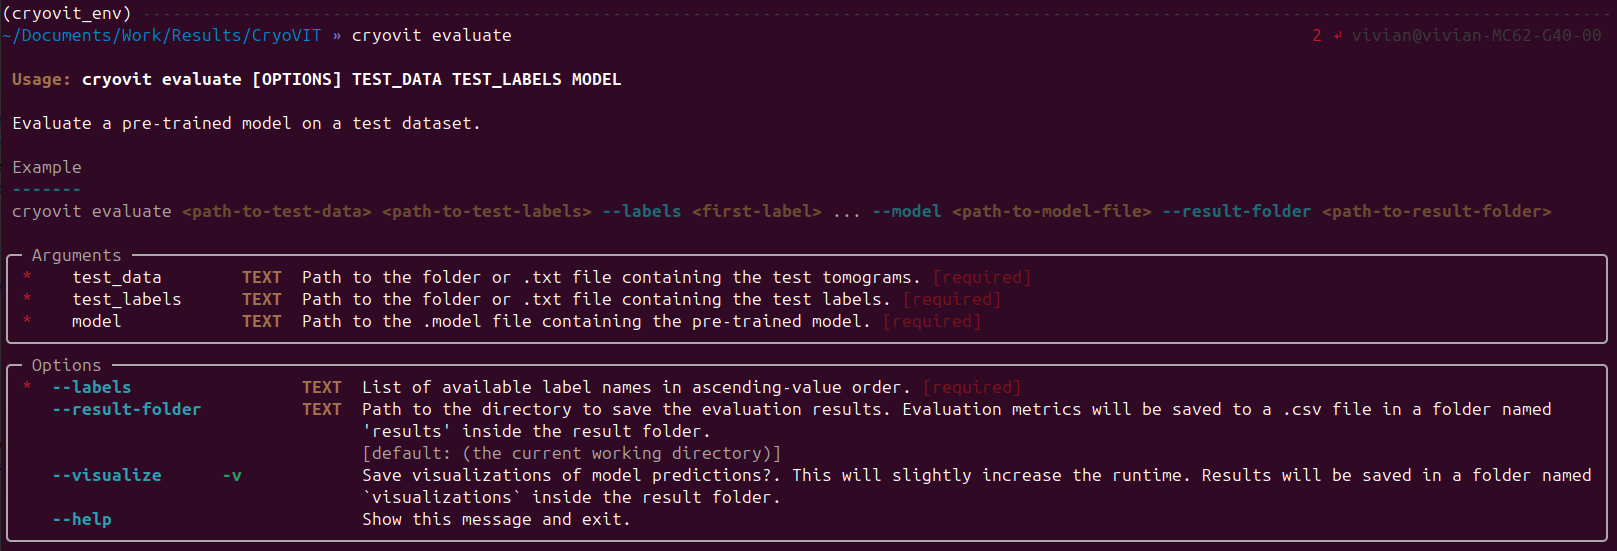
Output of cryovit evaluate --help command.
This command takes similar arguments to the train
command, except that you specify the test data and labels instead of
the train data and labels, and you also need to specify a pre-trained
model file. For example:
$ cryovit evaluate test.txt test_labels.txt mito_model.model
This results in a .csv file being created in a results folder in
the current directory, containing the DICE scores for each tomogram.
If you specify the --visualize argument (or -v for short),
then the predicted segmentations will be saved as .hdf files
in a predictions folder in the result directory (i.e., the
current directory).
Using a Pre-trained Model
You can use your trained model to segment new data using the
predict command:
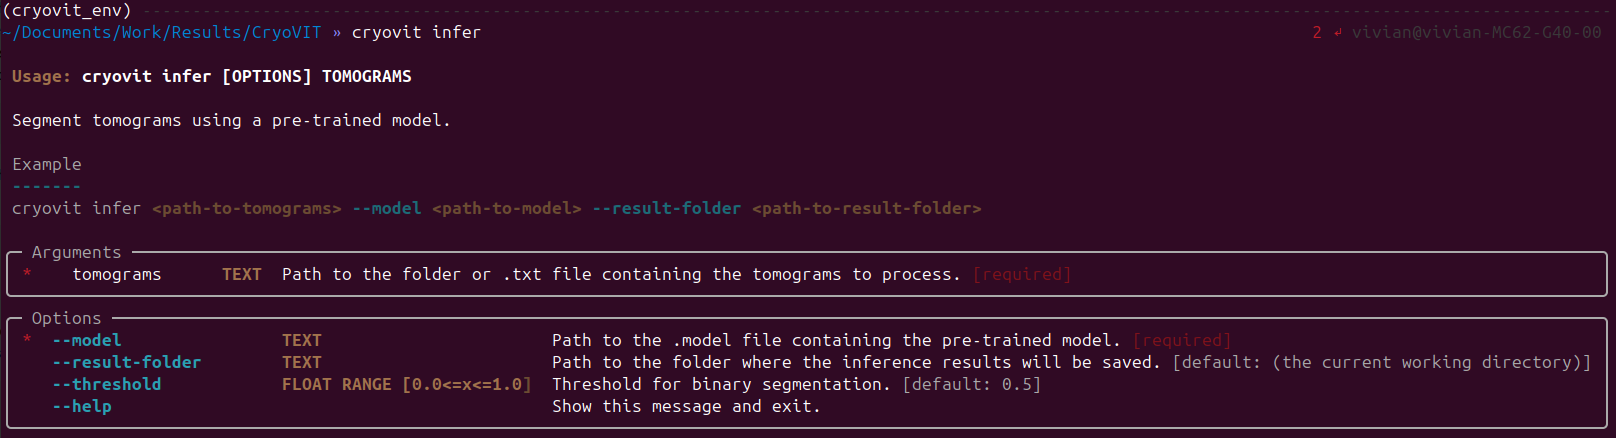
Output of cryovit infer --help command.
This command only requires you put the data to be segmented
in a single folder or list their paths in a .txt file,
and specify a pre-trained model file. For example:
$ cryovit infer data.txt mito_model.model
Similar to the evaluate command, this will create a predictions
folder in the current directory, containing the predicted segmentations
as .hdf files.
Tip
If you find that your predictions are either over-segmenting
or under-segmenting, you can adjust the threshold used to
binarize the predicted probabilities using the --threshold
argument. The default value is 0.5, but you can increase
this value to make the predictions more conservative, or
decrease it to make the predictions more aggressive.